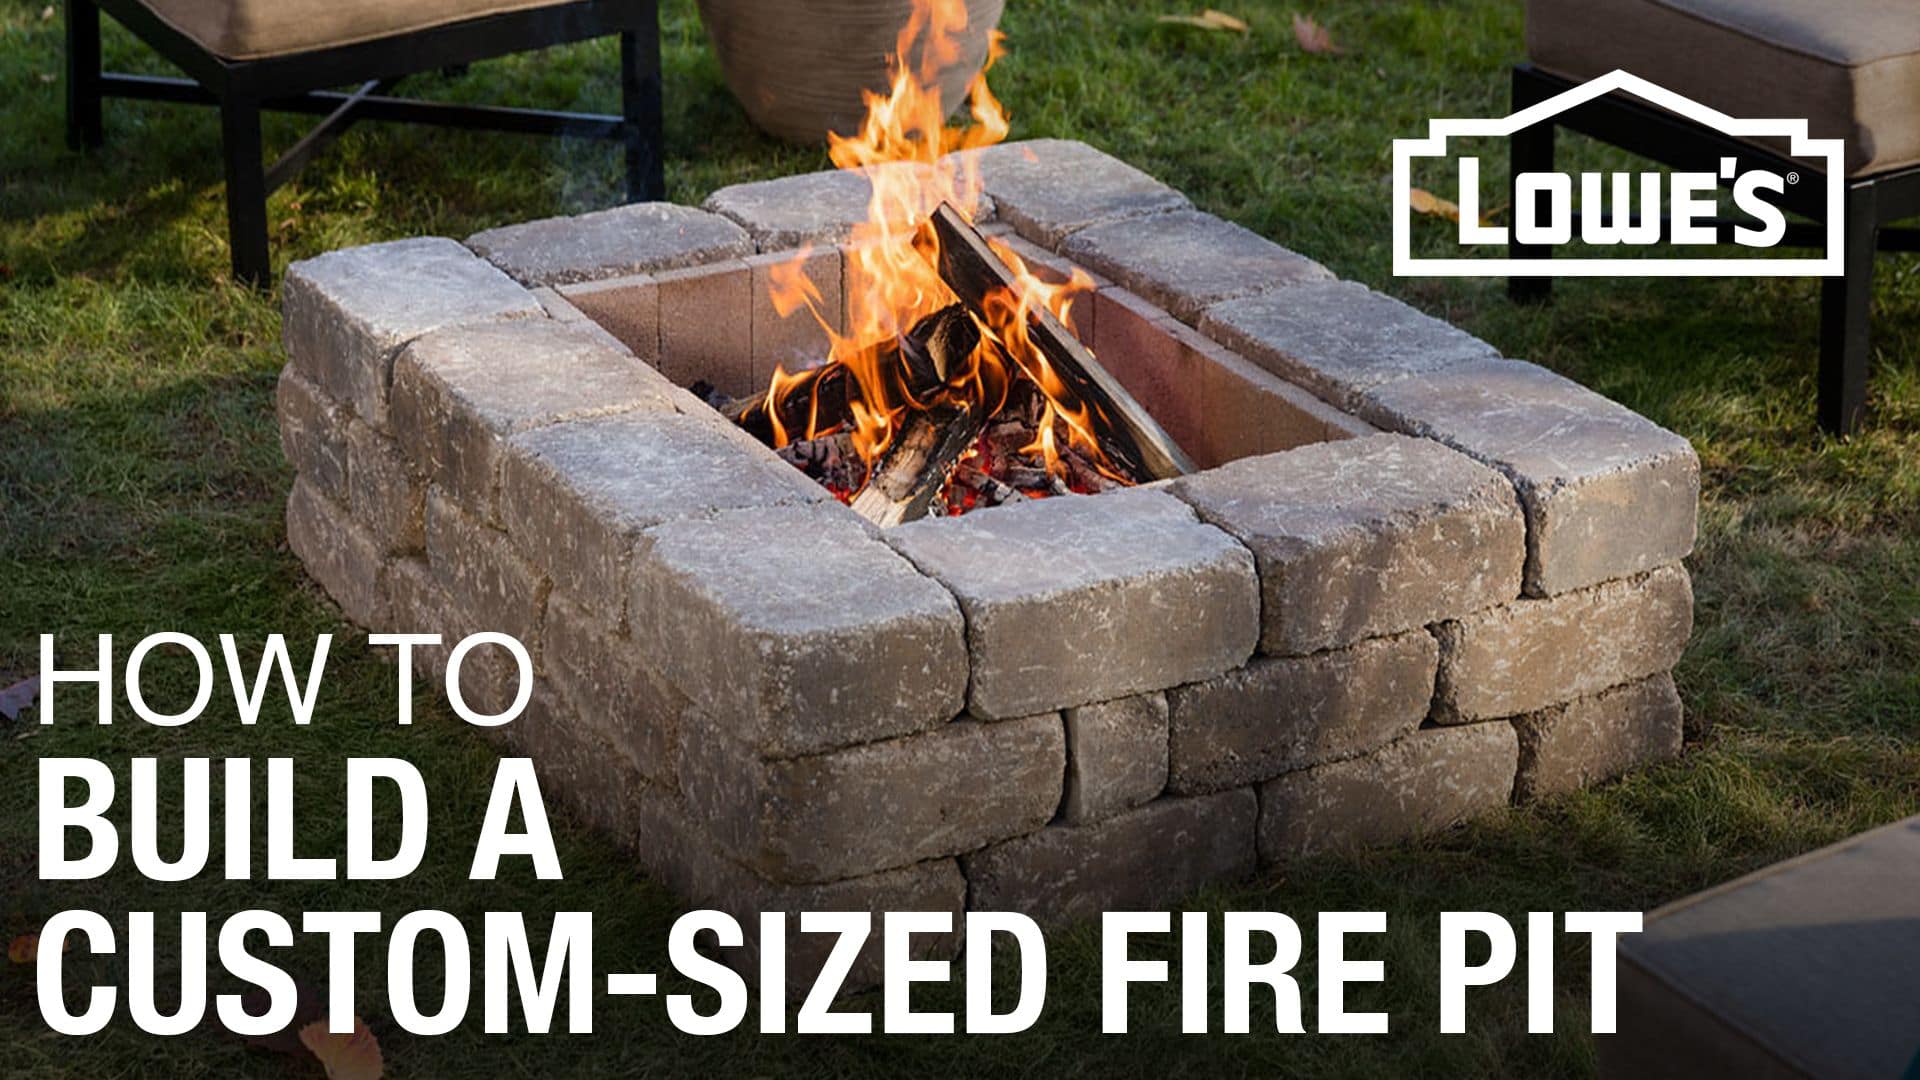
How to Build a Fire Pit: Easy Steps
This post contains affiliate links. As an Amazon Associate, we earn from qualifying purchases.
That first crackle of flames under a starry sky transforms any backyard into an instant gathering spot—but flimsy store-bought fire pits rarely deliver lasting value. Building your own fire pit costs under $100 for basic materials, creates a permanent centerpiece that withstands decades of use, and gives you full control over size and safety. This step-by-step guide walks you through exactly how to build a fire pit that meets fire codes, avoids common construction pitfalls, and becomes your go-to spot for weekend cookouts. You’ll learn precise measurements, heat-resistant material choices, and critical safety checks—so you can light your first fire with confidence this weekend.
Fire Pit Size and Location Planning
Avoid Dangerous Placement Mistakes
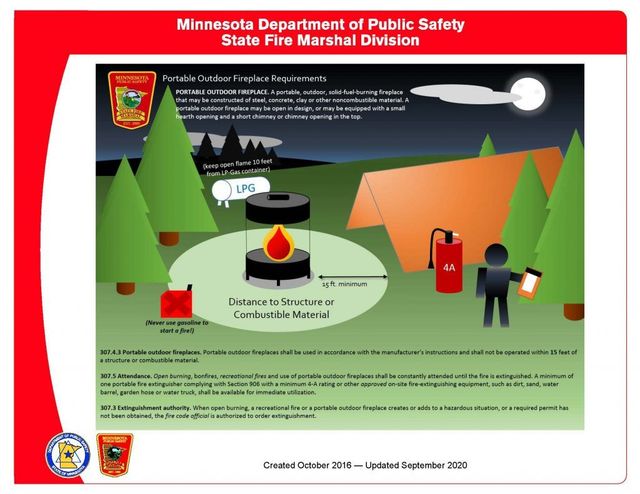
Your fire pit’s location directly impacts safety and usability—get this wrong, and you risk property damage or failed inspections. Measure 15 feet minimum from your house, fences, sheds, and overhanging tree branches. Position it near a water source like an outdoor spigot or hose reel for emergencies, but avoid low-lying areas where rainwater pools (this weakens foundations). Crucially, check for underground utilities first: Call 811 three business days before digging to have gas, electric, and water lines marked.
Critical clearance checklist:
– Overhead: Minimum 10 feet of vertical clearance from branches or power lines
– Ground: Level terrain with no slopes (use a 4-foot level to verify)
– Wind: Position seating perpendicular to prevailing winds to prevent smoke drift
– Utilities: Confirm no buried lines within 5 feet of your marked circle
Mark Your Perfect Fire Ring Diameter
Use these exact measurements for optimal heat distribution and seating comfort: A 36–44 inch interior diameter accommodates most yards while containing flames safely. Drive a wooden stake at your center point, then tie string extending 18–22 inches from it (half your target diameter). Keeping the string taut, walk a circle while spraying landscape paint on the ground. Double-check distances to structures with a tape measure—never rely on visual estimates. If your yard slopes, dig a shallow trench along the uphill side to create a level base before proceeding.
Essential Materials and Tools
Choose Fireproof Materials Only
Interior components (must endure 1,000°F+ heat):
– Fire bricks or concrete pavers rated for fire pits (standard bricks crack under heat)
– Steel fire ring (sold at hardware stores; size must match your pit diameter)
– Lava rock or fire-rated gravel for pit floor (never use pea gravel—trapped moisture causes explosive shattering)
Exterior wall materials:
– Retaining wall blocks (concrete or stone-look; 6–8 inches tall)
– Capstones for a finished edge (ensure slight overhang on both sides)
– Masonry adhesive rated for high heat (e.g., Loctite PL 500)
Base and drainage essentials:
– 3/4-inch drainage gravel (6-inch compacted layer)
– Paver base for stability (4-inch layer)
– All-purpose sand (1-inch leveling layer)
⚠️ Never risk these materials: River rocks, regular bricks, or any wood—even decorative logs near the pit. They retain moisture and can violently explode when heated.
Critical Tools for Precision Construction
Digging essentials:
– Shovel and mattock (for root-heavy soil)
– Wheelbarrow (transporting 500+ lbs of materials)
– Hand tamper (compacting gravel base)
Accuracy tools:
– 4-foot level (checking ring alignment)
– String line and stakes (maintaining perfect circle)
– Rubber mallet (adjusting block placement without cracking)
– Cold chisel and brick hammer (cutting blocks for tight fits)
Skip shortcuts like a 2-foot level or eyeballing measurements—these cause uneven walls that collapse under heat stress.
Step-by-Step Construction Process
Phase 1: Dig Foundation (2–3 Hours)
Excavate a circular trench 12 inches deep and one block width wide using your painted line as a guide. Remove interior soil an additional 6–12 inches deep (deeper in clay soils for drainage). Clear all grass roots and debris—any organic matter decomposes and creates voids. Pour 6 inches of 3/4-inch gravel, then compact it firmly with a hand tamper. Use your 4-foot level to check for flatness every 12 inches; add or remove gravel until the base is perfectly level. This step prevents future settling—skip it, and your walls will crack within months.
Phase 2: Build First Course (1 Hour)
Place your first retaining wall block on the compacted base, then check level front-to-back and side-to-side. Tap with a rubber mallet for micro-adjustments—even a 1/8-inch slope here cascades into major instability later. Continue placing blocks around the circle, butting them tightly against each other. Every 3–4 blocks, verify level across the entire ring. If blocks shift during placement, reset them immediately—this foundational course determines your pit’s structural integrity.
Phase 3: Construct Wall Structure (1–2 Hours)
Stagger joints like brickwork: Start the second course with blocks centered over the first course’s seams. Apply masonry adhesive in a zigzag bead along the top of two adjacent blocks using a caulking gun, then quickly place the next block before the adhesive sets (usually 5–10 minutes). Check level after each block and tap misalignments with your mallet. Build 3–4 courses high (12–16 inches total) for optimal seating height—any taller restricts visibility and heat output.
Phase 4: Install Fire Ring and Finish (1 Hour)
Position the steel fire ring inside your block circle so its top edge aligns perfectly with the wall’s height. Fill gaps between the ring and blocks with lava rock up to the rim—this absorbs thermal expansion. Line the pit floor with fire bricks or pavers, covering as much area as possible. Fill remaining spaces with heat-resistant gravel to create a smooth, level surface that won’t trap water. Cap the wall with flat stones using masonry adhesive, ensuring a slight overhang inward to prevent logs from rolling out.
Safety Requirements and Regulations
Pass Fire Department Inspections
Contact your local fire department before digging—many cities require permits for permanent fire pits. Verify size limits (typically max 36-inch diameter in urban zones) and HOA rules. Create a 3-foot non-flammable perimeter around the pit using gravel or pavers to stop embers from igniting grass. Install a 4-foot-tall windbreak on the windward side if you live in a breezy area. Skip these steps, and you risk fines or being forced to dismantle your pit.
First Fire Protocol
Wait 48 hours after construction for adhesive to cure fully. For your inaugural fire:
1. Start with crumpled newspaper and dry kindling only—never use gasoline
2. Keep a garden hose or 5-gallon water bucket within arm’s reach
3. Limit fire size to 1/3 the pit’s diameter initially
4. Supervise continuously until ashes are cold (minimum 24 hours)
5. Extinguish with water, not dirt (minimizes ash residue)
Maintenance and Long-Term Care
Prevent Costly Damage With Seasonal Checks
After each use, remove cooled ashes with a metal shovel (never plastic) and brush debris from capstones. Every spring, inspect for:
– Shifting blocks (reset with fresh adhesive if loose)
– Cracks in fire bricks (replace immediately—heat exploits weaknesses)
– Clogged drainage (clear gravel layers to prevent water pooling)
– Rust on steel ring (scrape and repaint with high-heat paint)
Cover the pit with a fitted metal lid during winter—this blocks moisture that freezes and cracks blocks. Never leave leaves or pine needles inside; they trap moisture against heat-sensitive materials.
Troubleshooting Common Problems

Fix Uneven Walls Before They Collapse
If your pit leans after heavy rain, use a 4-foot level to find low spots. Dig out affected blocks, add compacted gravel beneath, and reset them with adhesive. For chronic drainage issues (water pooling inside), dig a 4-inch-deep trench radiating from the pit and fill it with gravel to create a French drain. On severely sloped yards, build a retaining wall on the downhill side before starting your fire pit foundation.
Repair Exploding Rocks Immediately
If you used prohibited pea gravel and hear “popping” sounds, extinguish the fire and let the pit cool completely. Remove all river rocks or pea gravel from the fire zone—they retain moisture that turns to steam and shatters the stone. Replace with lava rock, which is porous and heat-stable. Check nearby seating areas for debris; these explosions can send shrapnel 20+ feet.
Fire Starting Success Tips
Build Self-Sustaining Fires in 5 Minutes
Skip lighter fluid—use this foolproof layering method:
1. Base: Crumpled newspaper (3 sheets)
2. Middle: Dry kindling in a teepee (pencil-thick sticks)
3. Top: Split logs arranged like a log cabin (never stack vertically)
Light newspaper in 3 spots, then step back. As flames rise, they preheat upper wood for instant ignition. Add larger logs only after coals form—rushing causes smoky, inefficient fires.
Pro tip: Store seasoned firewood under a tarp 20 feet from the pit. Wet wood creates excessive smoke that drifts toward seating. Keep logs no longer than 16 inches—they burn hotter and fit your 36–44 inch pit perfectly.
Your DIY fire pit becomes the heart of your backyard the moment you follow these precise steps. By choosing fire-rated materials, maintaining strict clearances, and performing seasonal checks, you’ll avoid the top mistakes that turn weekend projects into safety hazards. Light your first fire this weekend using the layering technique—then invite neighbors over to toast marshmallows in your custom-built gathering spot. Remember: A properly constructed fire pit adds both enjoyment and value, but only when built with these critical safety details in mind.