How to Clean Gas Grill Grates: Quick Steps
This post contains affiliate links. As an Amazon Associate, we earn from qualifying purchases.
Your gas grill grates shouldn’t look like a charcoal briquette graveyard after cooking. When stuck-on grease turns your stainless-steel or porcelain-coated grates into a science experiment, how to clean gas grill grates becomes your most urgent summer question. Skip proper cleaning, and you’ll battle uneven heat, stubborn food residue, and ruined recipes—all while shortening your grill’s lifespan. This guide cuts through the guesswork with field-tested methods that work on all grate types (porcelain, cast iron, stainless steel), saving you hours of elbow grease. You’ll master daily maintenance that prevents disasters and deep-cleaning tactics for even the most neglected grates—no chemical expertise required.
Prevent Daily Grime Buildup With 5-Minute Post-Cook Routine
Ignoring this step guarantees tomorrow’s scrubbing session will take 10x longer. The magic happens while your grill is still hot—don’t let it cool before acting.
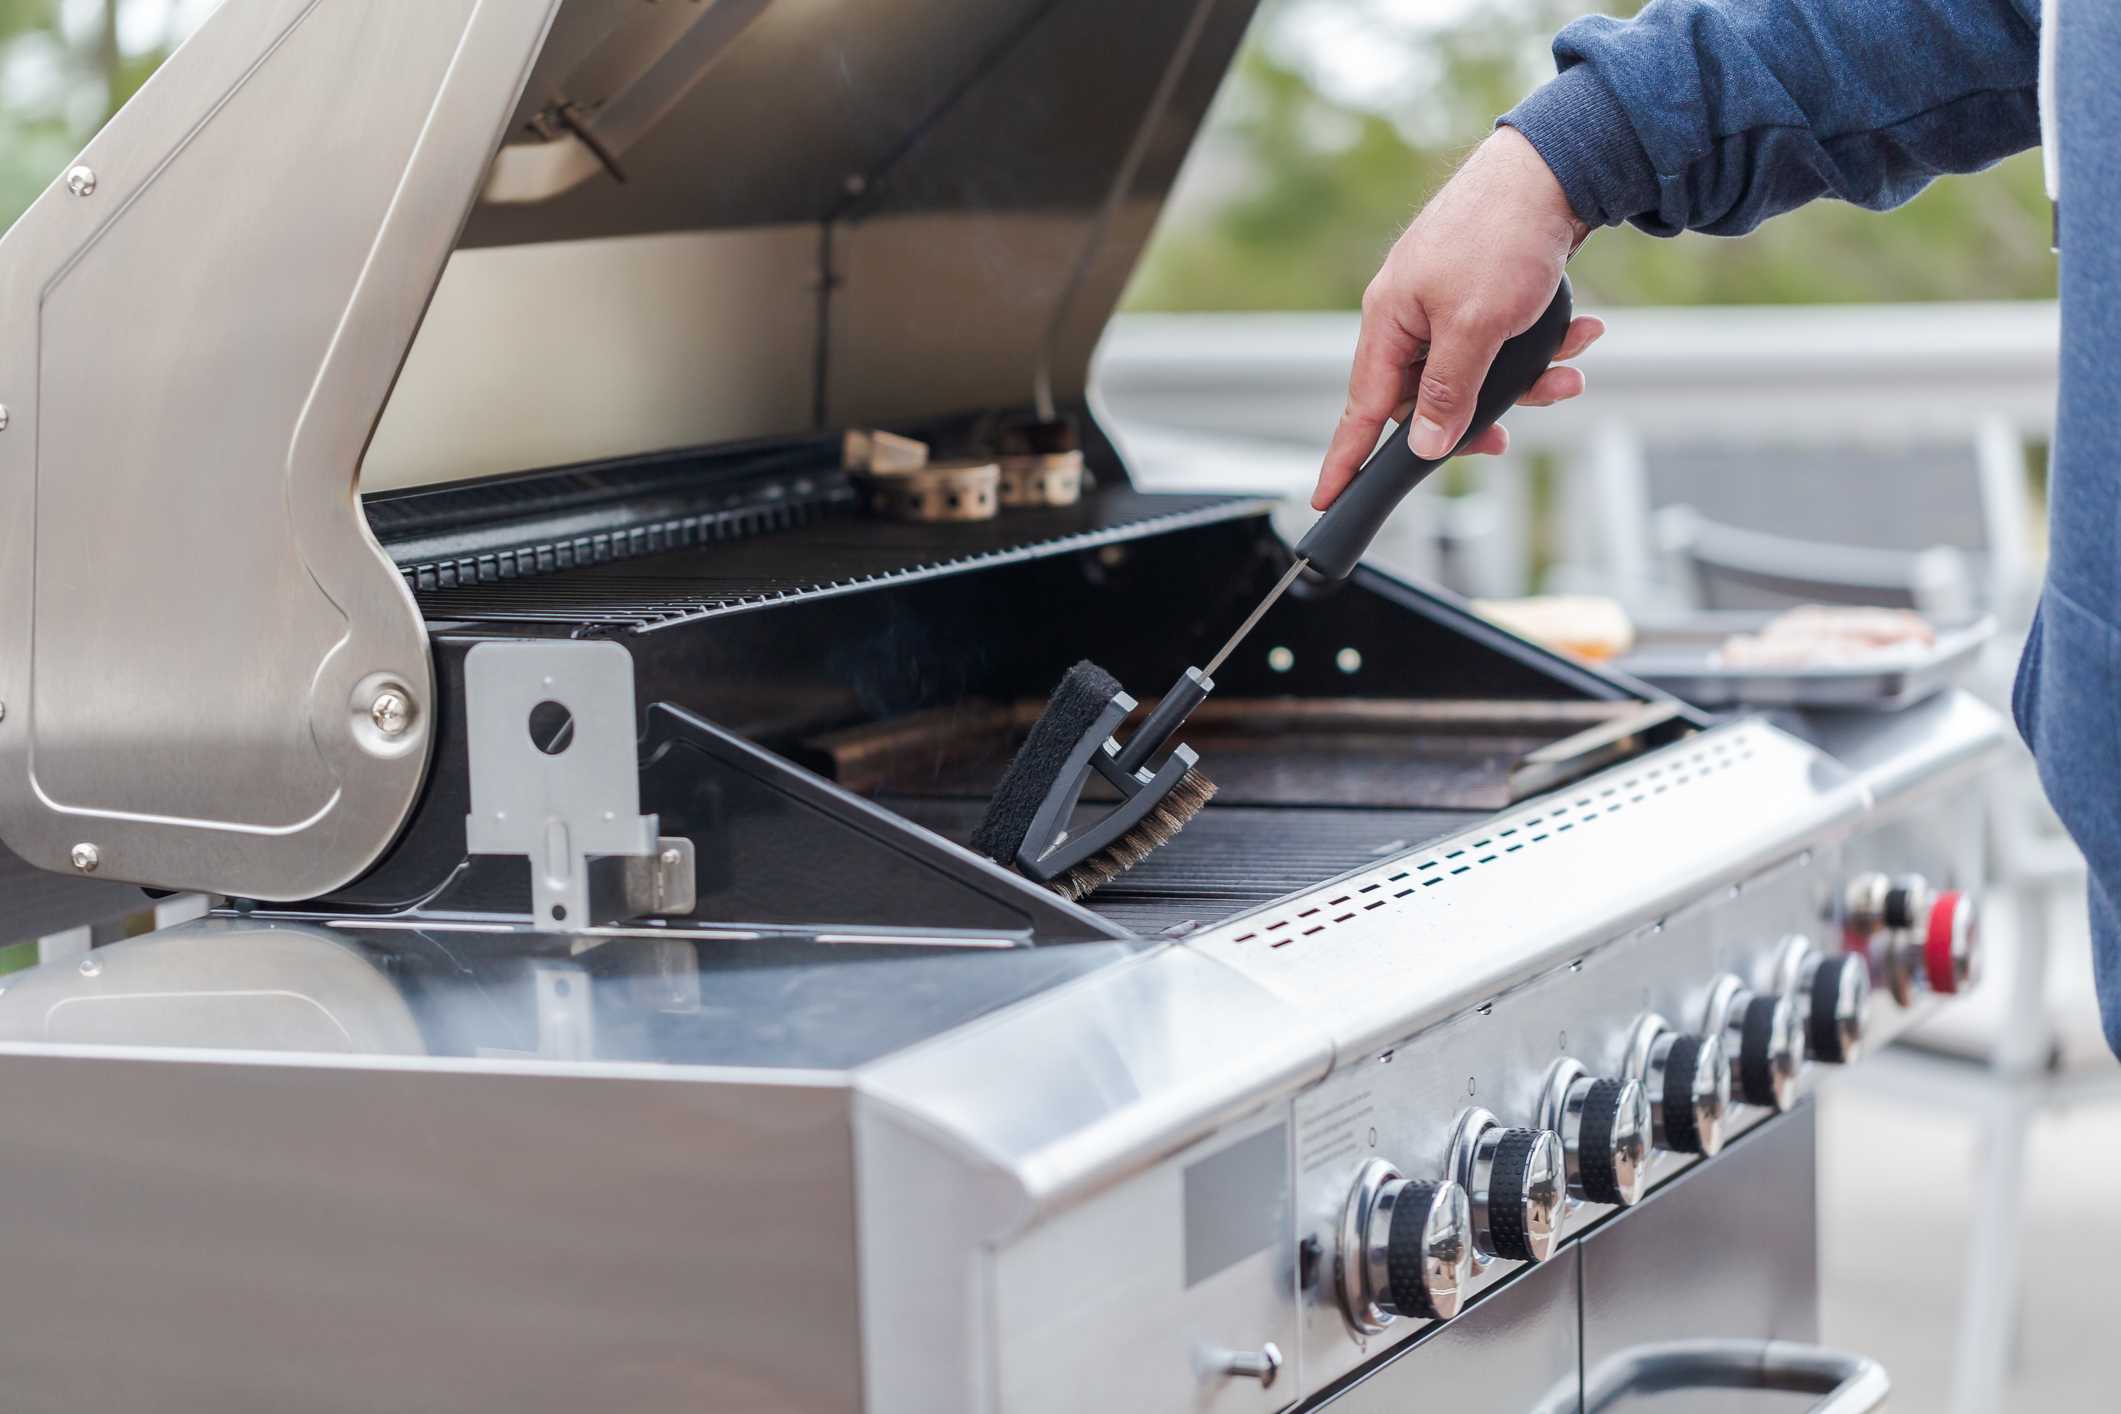
Burn-Off and Brush Technique for Instant Debris Removal
Fire all burners to HIGH and close the lid for exactly five minutes. Watch for thin smoke wisps—this signals carbonized food particles lifting from the surface at the critical 480°F temperature. Never skip the timer; exceeding five minutes risks warping thin stainless grates. Once done, grab a nylon or brass-bristle brush (steel bristles will chip porcelain coatings) and scrub parallel to the rods. Work from front to back in smooth strokes—zigzag motions trap debris between rods. If residue resists, repeat the burn-off cycle once. This simple ritual removes 80% of daily buildup before it hardens.
Oil Wipe Down for Rust Prevention and Non-Stick Performance
While grates are warm (but cool enough to touch briefly), dip a paper towel in high-smoke-point oil like grapeseed. Hold it with long-handled tongs and wipe a micro-thin layer across all surfaces in one direction. This creates an instant non-stick barrier that prevents tomorrow’s chicken from welding itself to the metal. For extra cleaning power, try the onion hack: spear a halved yellow onion with a fork and rub cut-side-down over grates. Natural acids dissolve light grease while adding antimicrobial protection—no chemicals needed.
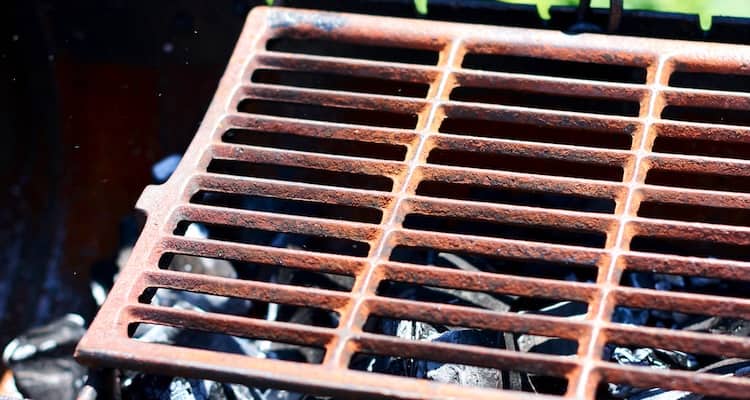
Tackle Heavy Buildup With These Proven Deep-Cleaning Methods
When grates resemble a charcoal briquette sculpture, these three techniques restore function without replacement costs. Always cool grates completely before removal and photograph their orientation if your grill uses staggered sections.
Baking Soda Paste Power Clean for Chemical-Free Results
Best for: Moderate carbon buildup on porcelain or stainless grates where chemicals are undesirable.
Mix ½ cup baking soda with ¼ cup Dawn Platinum dish soap to a toothpaste-like consistency. Using nitrile gloves, coat every surface—including rod undersides and crevices—with a 2-3mm layer. Let dwell 30-40 minutes while alkaline reactions saponify grease into removable soap. Scrub with crumpled aluminum foil (less abrasive than brushes) or a chainmail scrubber, focusing on stubborn spots. Rinse until water runs clear, then immediately pat dry and apply oil to prevent flash rust. This $1.50 method removes 90-95% of residue in under an hour—no toxic fumes or safety gear required.
Vinegar and Baking Soda Overnight Soak for Extreme Carbonization
Best for: Grates caked with years of carbon where time isn’t critical.
Double-bag grates in heavy-duty contractor trash bags to prevent leaks. Pour 2 cups white vinegar inside, then sprinkle 1 cup baking soda (expect vigorous fizzing). Seal tightly, expel air, and lay flat in shade for 12-14 hours. The acid-base reaction dissolves carbon into sludge that rinses away effortlessly. Critical tip: Rinse twice to eliminate vinegar odor that otherwise transfers to food. Most residue falls off with light nylon brushing—no strenuous scrubbing needed. While slower than other methods, this approach requires just 10 minutes of active effort for dramatic results.
Emergency Restoration for Hopelessly Neglected Grates
When grates haven’t been cleaned since your grill’s warranty expired, these heavy-duty solutions deliver last-chance revival. Always wear chemical-resistant gloves and eye protection—lye-based cleaners cause severe burns.
Easy-Off Oven Cleaner for “As Good as New” Results
Shake Easy-Off Heavy Duty vigorously and spray 6-8 inches from cool grates until fully coated in foam. Let dwell 40-80 minutes (foam darkens as it dissolves decades of grease). Rinse thoroughly with high-pressure hose, then wash with warm soapy water to neutralize lye residue. Non-negotiable final step: Run burners on HIGH for 15 minutes before cooking to volatilize any chemical traces—your next burger shouldn’t taste like a chemistry lab. This method removes 99% of buildup but never use on porcelain grates—lye destroys the coating.
Seasoning and Storage Secrets for Long-Lasting Grates

Clean grates stay cleaner longer with proper post-care. Skip these steps, and rust will reappear within days.
Foolproof Seasoning Protocol After Every Deep Clean
Reinstall bone-dry grates and fire all burners to MEDIUM-HIGH for 10 minutes. Using oiled paper towel and tongs, apply a micro-thin oil layer across rods until smoke appears (signaling polymerization). Let smoke subside, then cool with lid closed. This creates a natural non-stick surface that improves with each use—like a cast-iron skillet. For cast-iron grates, repeat seasoning twice for maximum protection against moisture.
Storage Mistakes That Cause Rust Overnight
Never cover hot grates—trapped steam rusts metal faster than neglect. Use breathable, UV-resistant covers instead of plastic tarps that turn your grill into a moisture trap. During off-season storage, wipe cast-iron grates with oil every two weeks. For stainless steel, ensure complete dryness before covering; residual moisture causes pitting that attracts future buildup.
Troubleshooting Common Grate Problems
Rust Spots After Cleaning? Here’s the Fix
Light surface rust? Scrub gently with aluminum foil ball, rinse, and re-oil immediately. If rust covers over 10% of the surface, replacement is safer—deep pits harbor bacteria and accelerate deterioration. Never use steel wool; it embeds particles that cause worse rusting.
Food Still Sticking? Diagnose Your Seasoning Failure
Inadequate polymerization causes sticking. Repeat seasoning with grates heated longer (15 minutes at MEDIUM-HIGH) and ensure oil reaches smoke point. Use grapeseed oil—it polymerizes better than vegetable oil. Test with a potato slice; if it releases cleanly, your seasoning works.
Wire Brush Bristles in Food? Switch Tools Immediately
Ingested bristles cause internal injuries requiring emergency surgery. Stop using wire brushes—opt for nylon, brass, or chainmail alternatives. If bristles embed in food, discard the entire meal. Your safety isn’t worth risking over a $20 brush.
Quick Reference: Gas Grill Grate Cleaning Matrix
| Method | Active Time | Total Time | Best For | Effectiveness |
|---|---|---|---|---|
| Baking Soda Paste | 40 min | 60 min | Regular deep cleans | ★★★★☆ (95%) |
| Vinegar Soak | 10 min | 10-14 hr | Extreme carbon buildup | ★★★★☆ (85%) |
| Easy-Off | 20 min | 90 min | Last-resort restoration | ★★★★★ (99%) |
| Aluminum Foil Wipe | 5 min | 5 min | Daily maintenance | ★★☆☆☆ (30%) |
Essential Supplies Checklist
Keep these stocked for effortless cleaning:
– Baking soda (bulk box)
– Dawn Platinum dish soap (superior grease-cutting)
– White vinegar (gallon jug)
– Heavy-duty aluminum foil
– Nylon or brass grill brush
– Grapeseed oil (high-smoke-point)
– Contractor trash bags (3 mil thickness)
Mastering how to clean gas grill grates transforms summer cookouts from stressful chores to seamless celebrations. Start with the 5-minute post-cook routine to prevent buildup, escalate to baking soda paste for seasonal deep cleans, and reserve chemical methods for true emergencies. Clean grates cook more evenly, prevent dangerous flare-ups, and last 3-5x longer—saving you replacement costs and guaranteeing perfect sear marks every time. Your next steak deserves better than yesterday’s residue. Fire up the grill, not the frustration.