How to Cover Outdoor Fire Pit
This post contains affiliate links. As an Amazon Associate, we earn from qualifying purchases.
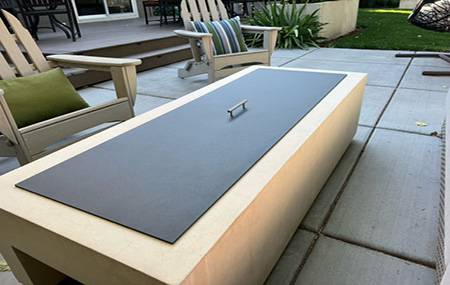
Your backyard fire pit sits exposed, collecting leaves, rusting in rain, and becoming a nightly mosquito breeding ground. That expensive steel bowl you invested in last summer now shows early signs of corrosion, and you’re dreading the hour-long cleaning ritual before every use. A quality cover transforms this maintenance nightmare into a grab-and-go setup, protecting your investment while adding functionality to your outdoor space.
Covering your fire pit isn’t just about protection—it’s about extending its life, maintaining its appearance, and even creating an extra table surface when not in use. Whether you choose a quick fabric solution, invest in weatherproof metal, or craft a custom wood top, the right cover saves you time, money, and frustration while keeping your fire pit ready for spontaneous gatherings.
Select the Best Cover Type for Your Fire Pit
Fabric Covers: Quick and Affordable Protection
Fabric covers provide immediate, budget-friendly protection with shapes designed for every fire pit style. Round covers start at $20.99 for basic models, while premium rectangular versions reach $130.99 for large setups. Available in nine color options from classic green to prestige clay, these polyester covers resist UV damage and include drawstring closures for wind resistance.
Size matching made simple: Measure your fire pit’s diameter and add 4 inches for the perfect fit. A 32-inch fire pit needs a 36-inch cover for proper coverage without sagging. Don’t forget to factor in height—choose covers 1 inch shorter than your fire pit height to prevent wind lifting while ensuring full protection.
Metal Covers: Premium Weather Resistance
PiTTopper® metal covers withstand 55 mph winds using powder-coated steel construction. Custom sizing from 30″ to 114″ accommodates any fire pit type, including custom brick installations. The $159 storage stand option keeps your cover organized and accessible, while custom color matching ensures seamless outdoor décor integration.
Critical wind protection tip: Metal covers provide superior security during storms compared to fabric alternatives. They won’t flap in high winds or tear from debris impact, making them ideal for exposed locations or areas with frequent severe weather.
DIY Wood Covers: Transformative Custom Solutions
Wood covers provide ultimate customization, transforming into functional coffee tables when not covering flames. Pressure-treated pine runs approximately $100 in materials for a 43″ fire pit, while premium ipe hardwood offers enhanced durability. These covers allow personal touches like engraved initials or mosaic tile insets.
Pro tip: Wood covers should extend exactly 1 inch beyond your fire pit’s edge—this prevents sliding while ensuring easy removal. Any more overhang creates tripping hazards, while less causes the cover to slide into the pit.
Measure Your Fire Pit for Perfect Cover Fit
Take Precise Measurements Before Ordering
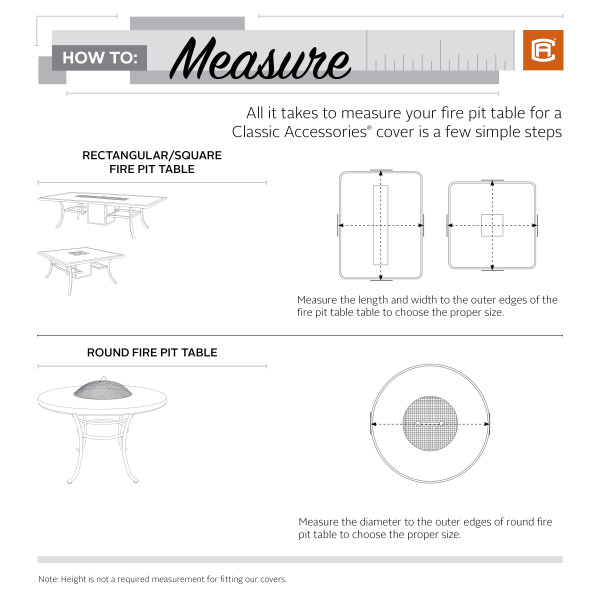
Never guess your fire pit dimensions—accurate measurements prevent wasted money on ill-fitting covers. For round pits, measure diameter across the widest point. Square pits require length, width, and total height measurements. Rectangular pits need all three dimensions recorded for proper fit.
Hidden measurement trap: Include any protruding handles or decorative elements in your height measurement. These features often catch covers during installation, causing tears or improper fit that compromises protection.
Calculate Proper Overhang for Maximum Protection
Add exactly 1 inch to your fire pit diameter for wood covers—this prevents sliding while ensuring easy removal. Fabric covers need 4 inches extra diameter for complete protection plus drawstring tensioning. When substituting round covers for square pits, multiply your square’s width by 0.6667 to find equivalent round coverage.
Real-world example: A 32-inch square fire pit requires a 48-inch round cover (32 ÷ 0.6667 = 48). This calculation ensures full coverage without unsightly gaps where debris can enter.
Account for Height Differences in Cover Design
Choose covers 1 inch shorter than your fire pit height. This prevents wind lifting while ensuring full protection. Deep fire pits require frame-supported construction methods rather than simple flat covers—this structural reinforcement prevents bowing and extends cover lifespan.
Warning: Covers that sit flush with or above your fire pit rim create dangerous tripping hazards. Always maintain that critical 1-inch height difference for safety.
Install Fabric Covers Without Common Mistakes
Pre-Installation Safety Check: Avoid Heat Damage
Never cover a warm fire pit—wait until all surfaces feel cool to touch. Extinguish every coal completely, checking ash piles for hidden embers. Even residual heat can melt polyester covers or warp vinyl materials, creating expensive replacement needs.
Critical check: Insert your hand near the fire pit opening—if you feel any warmth, wait longer before covering. Rushing this step risks permanent cover damage that voids warranties.
Secure Installation Steps for Wind Resistance
- Clean the surface: Remove debris, ashes, and moisture to prevent staining
- Position the cover: Center over fire pit with equal overhang on all sides
- Tighten drawstrings: Pull until snug but not stretched to avoid fabric tears
- Add support bags: Insert air bags ($9.99-$19.99) to prevent water pooling
- Final inspection: Check stability by gently tugging all sides
Pro tip: Install air bags before securing drawstrings—they create a dome shape that sheds rainwater instead of collecting it.
Prevent Seasonal Damage to Fabric Covers
Avoid PVC covers in cold climates—they crack and flake when temperatures drop. Instead, choose polyester or ripstop variants rated for your climate zone. Replace covers showing UV fading, tears along seams, or broken drawstring mechanisms before complete failure occurs.
Seasonal reminder: Store fabric covers indoors during extended winter months—moisture trapped in folds creates mildew and material breakdown that shortens lifespan.
Build a Custom Wood Cover That Lasts
Gather Essential Materials and Tools
Pressure-treated pine method requires:
– 4 pieces 1×6 pressure-treated pine (8′ lengths for 43″ fire pit)
– Kreg jig with exterior screws
– Jigsaw with fine-tooth blade
– Clamps and measuring tools
– Semi-transparent deck stain (2 coats minimum)
– Marine-grade weatherseal for underside rim
Ipe hardwood upgrade adds:
– Dense ipe decking boards
– Router with round-over bit
– Random orbital sander
– Exterior wood glue for invisible joints
Tool tip: A router jig with pivot point creates perfect circles—this specialized tool pays for itself in professional results.
Construction Process: From Boards to Finished Cover
Prepare and Cut Boards for Seamless Joints
Measure your fire pit diameter, adding exactly 1 inch for overhang. Cut boards to calculated length using a miter saw for square ends. Remove factory-eased edges with a table saw to create flat joining surfaces—this prevents visible gaps in your finished cover.
Critical step: Arrange boards considering grain direction and visual appeal before final assembly—this aesthetic choice makes your cover look professionally crafted.
Create Solid Panel with Professional Finish
Apply exterior wood glue to joining edges, then clamp boards together using center alignment marks. Wipe excess glue immediately—wait 1 hour for initial set before handling. Sand the surface smooth with 120-grit paper, progressing to 220-grit for furniture-grade finish.
Pro technique: Add metal braces underneath using #12 sheet metal screws to prevent warping—this reinforcement doubles your cover’s lifespan.
Maintain Your Fire Pit Cover for Maximum Lifespan
Fabric Cover Maintenance Schedule
Inspect monthly for tears, UV damage, or loose stitching. Clean with mild soap and water, avoiding harsh chemicals that break down water-resistant coatings. Store fabric covers in dry locations during extended non-use periods—moisture trapped in folds creates mildew and material breakdown.
Seasonal tip: Reapply water-resistant spray annually to maintain protective qualities—this simple step extends cover life by 2-3 years.
Wood Cover Care Routine
Reapply protective finish annually, or bi-annually in harsh climates. Sand lightly between coats to maintain smooth surface. Check brace screws for loosening due to seasonal expansion and contraction. Address any warping immediately to prevent permanent deformation.
Warning: Never store wood covers directly on damp ground—use cinder blocks or a storage stand to prevent moisture absorption that causes warping.
Transform Your Fire Pit into Multi-Functional Outdoor Space
Create Dual-Purpose Surfaces That Impress
Quality covers convert fire pits into functional tables for drinks, plates, or decorative items. Wood covers support up to 50 pounds when properly constructed, while metal covers often exceed 100-pound capacity. Add felt pads underneath to prevent scratching your fire pit rim.
Entertaining hack: Install discreet handles that double as cup holders when inverted—this clever design element makes your cover more functional.
Budget Smart: Get Maximum Value for Your Investment
Basic round fabric covers solve immediate protection needs for under $50. Square versions run $25.99-$29.99 with color choices included. Add a $9.99 air bag for water pooling prevention—total investment under $40 for complete protection.
ROI calculation: A $100 DIY wood cover pays for itself in just two years by preventing the $300+ cost of replacing a rusted fire pit.
Your fire pit deserves protection that matches your lifestyle and budget. Whether you grab a $26 fabric cover today or craft a custom wood masterpiece this weekend, covering your outdoor fire pit prevents costly replacement while ensuring spontaneous fires remain a joy, not a chore. With proper sizing, installation, and maintenance, your cover will keep your fire pit looking new for years to come—ready whenever you want to gather friends and family around the flames.